
Clips & screenshots
TRS Launcher can record your game like a replay tool: F9 saves the last seconds as a clip, F10 starts and stops a normal recording. All clips and screenshots of all instances are collected in two galleries.
Turn clips on
Clips are off by default.
Open the clip settings
Settings → Clips & recording – or Turn on on the Clips page.
Switch on "Clips & recording"
The launcher downloads the recorder (FFmpeg) once and checks it by checksum.
Adjust if you like
Clip length (how far back a clip goes), Resolution, Frame rate, Quality and the Encoder (Automatic uses your NVIDIA, AMD or Intel graphics card and falls back to software). Under Sound: System sound is on, Microphone is off by default. Storage limit moves the oldest clips to the recycle bin when the folder gets too big.
Record in the game
While an instance started from the launcher is running:
- F9 saves the last seconds as a clip.
- F10 starts and stops a recording.
The keys come with the TRS Client – change them in the Minecraft controls under "TRS Client". The Clips page also has Save clip, Start recording and Stop recording for running games.
The clip gallery
Clips in the sidebar shows all your clips as tiles with a preview picture, length and date. Search by name, filter by instance and sort by date, length, size or name. Hover over a tile for a moving preview. Every instance also has its own Clips tab.
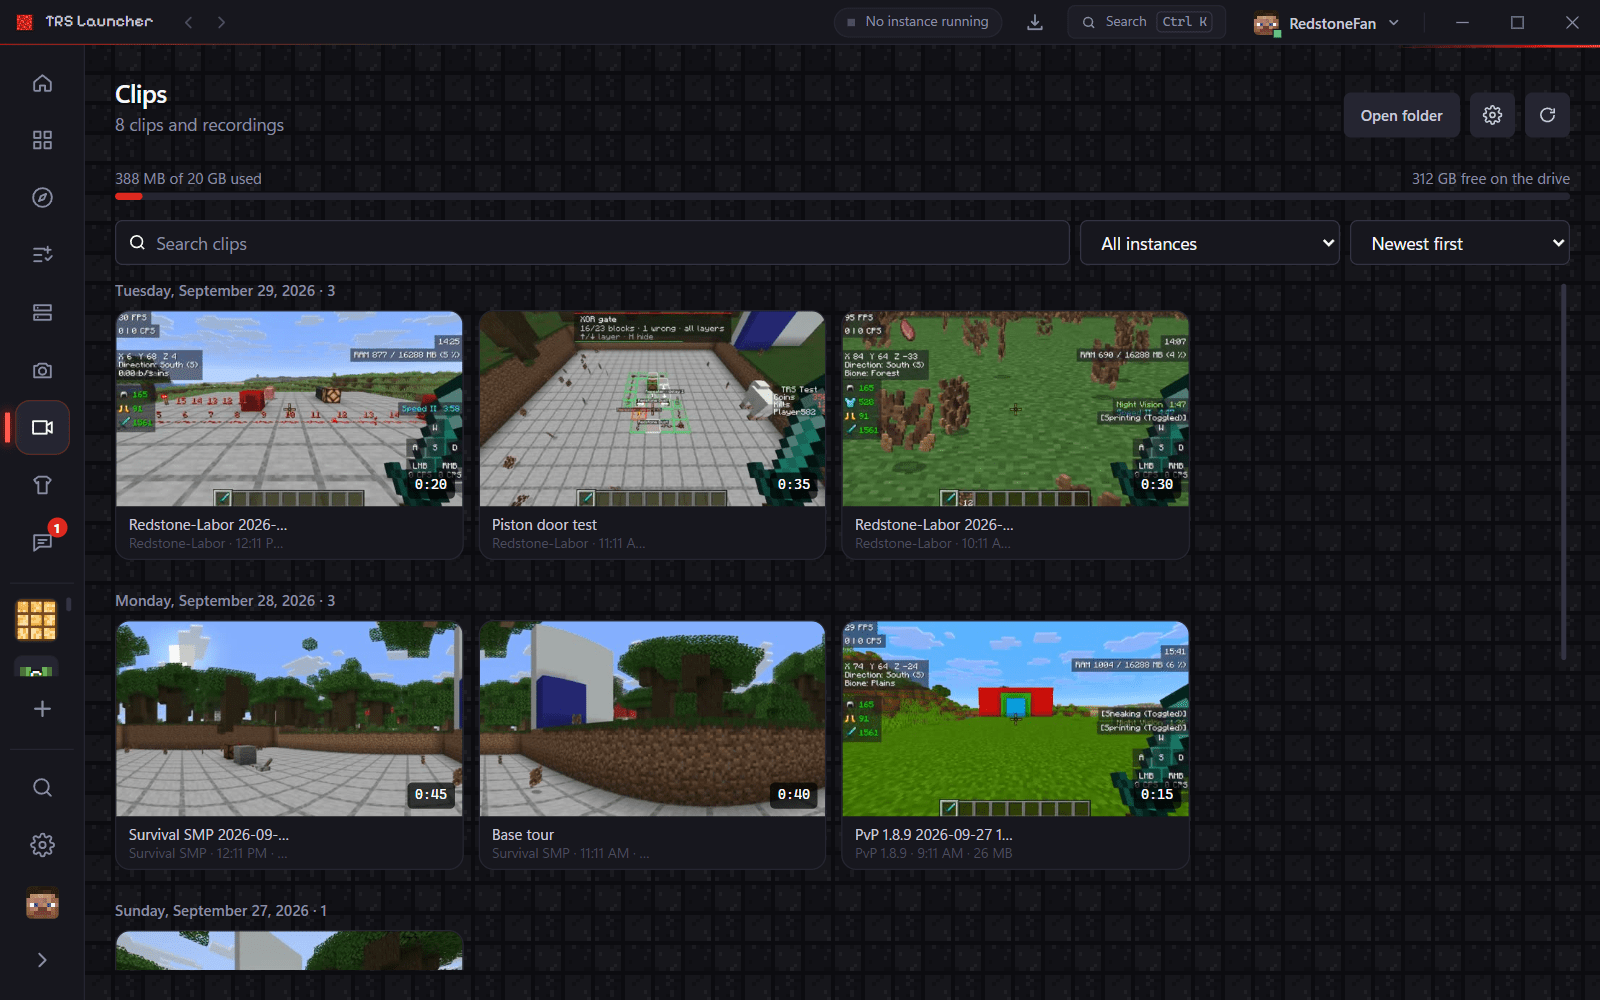
The player
Click a clip to play it. The timeline shows a small preview while you hover over it.
| Key | Action |
|---|---|
| Space or K | Play / pause |
| ← / → | 5 seconds back / forward |
| J / L | 10 seconds back / forward |
| , / . | Single frame |
| F | Full screen |
| M | Mute |
| Alt + ← / → | Previous / next clip |
If a clip can't be played in the launcher, it offers to open it in your system's video player.
Trim a clip
Click "Trim"
Set Start and End on the timeline – or press I and O at the current position.
Check the selection
Preview plays only the selection. Under How to cut you choose Automatic, Fast or Exact.
Save
Save as new clip – the original always stays unchanged.
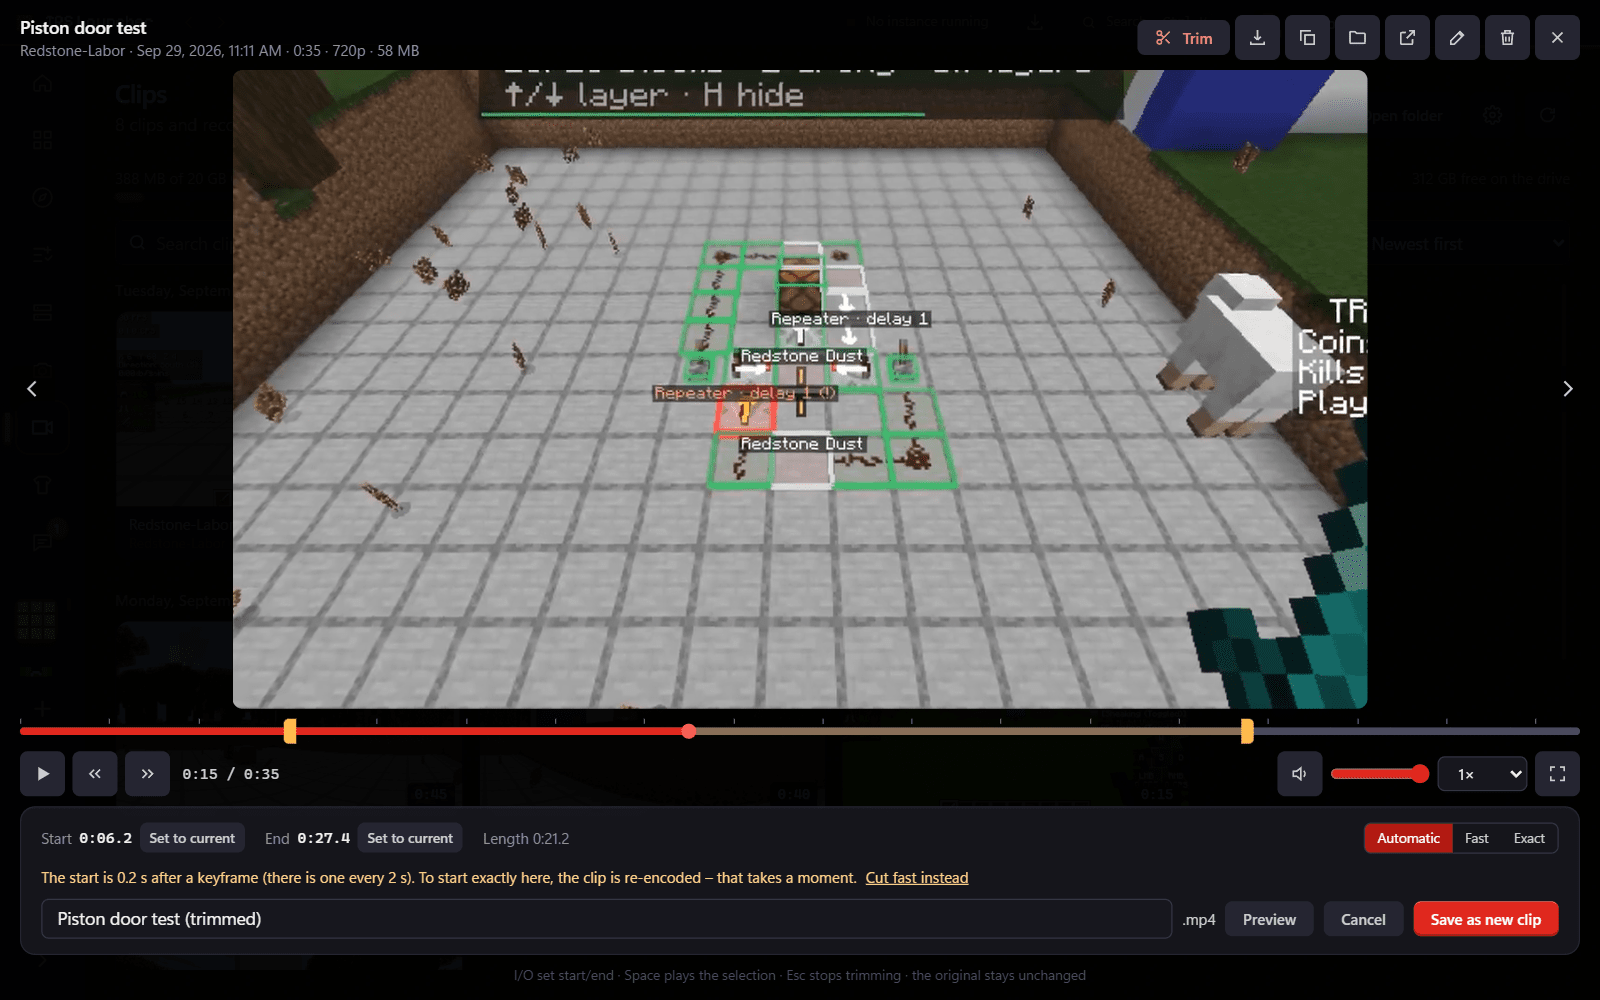
Fast copies without re-encoding in an instant (the start moves to the previous keyframe). Exact re-encodes frame-accurately and takes a moment. Automatic copies when the start is on a keyframe and cuts exactly otherwise.
Share a clip
Save as … exports a copy, Copy file puts the clip on the clipboard so you can paste it into Discord or a folder. You can also Show in folder, Rename and delete clips (to the recycle bin).
The screenshot gallery
Screenshots in the sidebar collects the screenshots of all instances (take them with F2 in the game). Filter by instance and click a picture to see it in full size – browse with the arrow keys, Esc closes.
- Copy puts the picture on the clipboard.
- Show in folder opens it in your file manager.
- Delete moves it to the recycle bin (on Linux: the trash).
- Share as link uploads the picture and copies a public link that works for 30 days – Discord shows a preview. My shared pictures lists your links and lets you delete them earlier. This uses the optional TRS services.
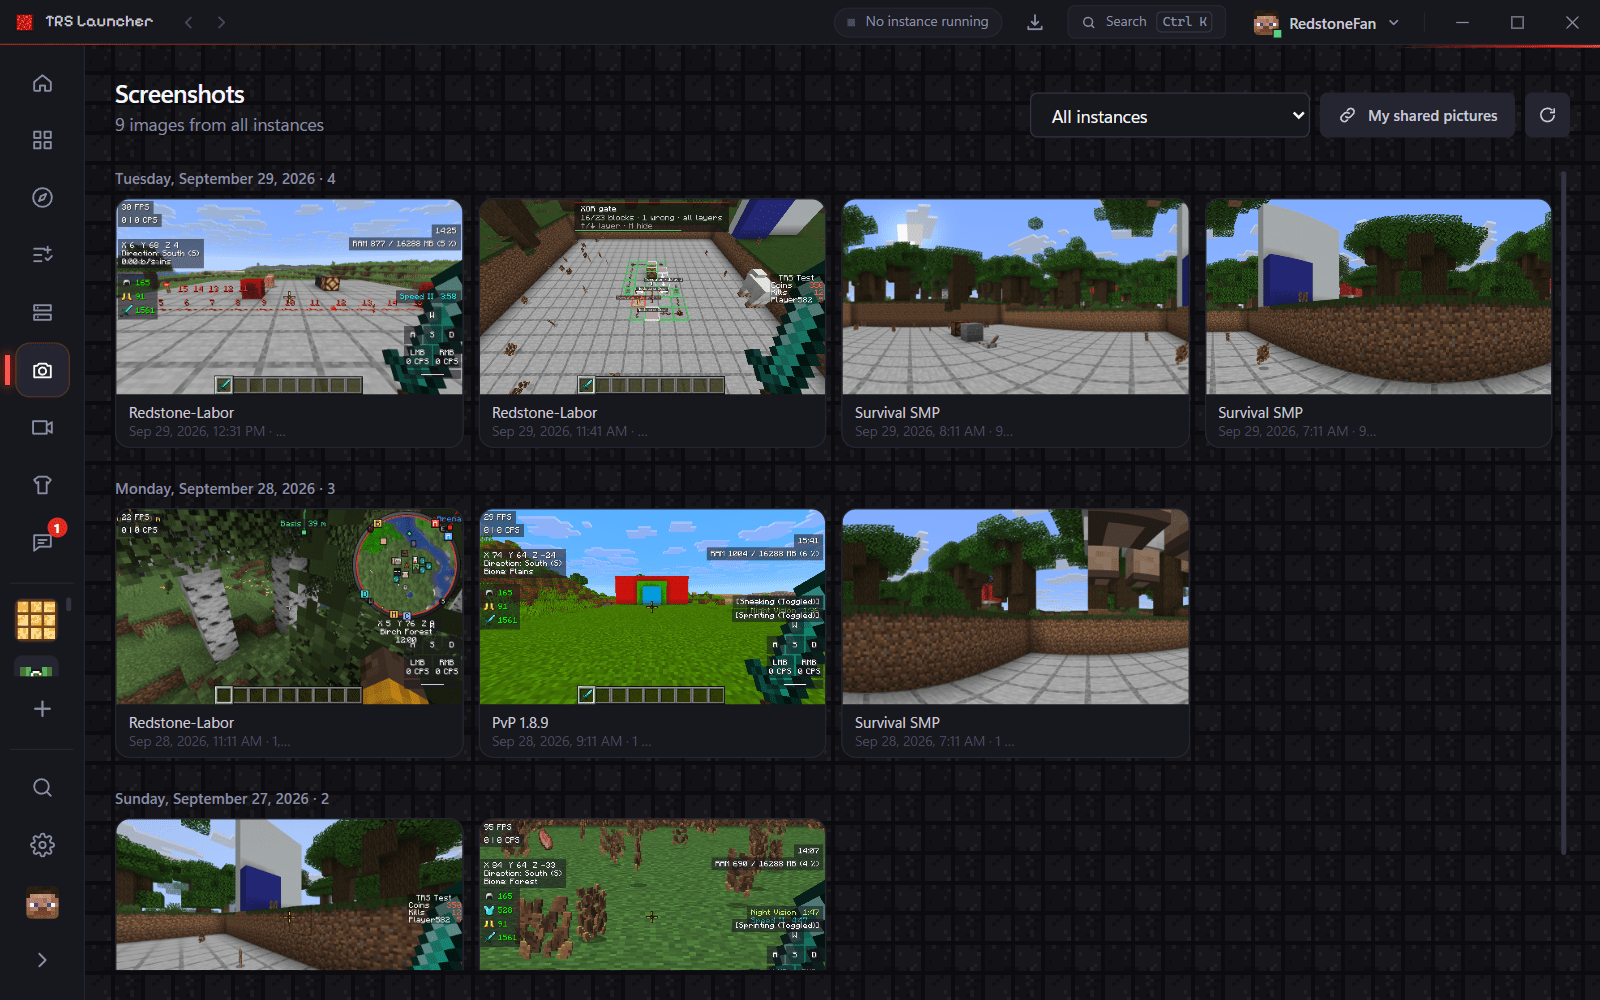
Import from other launchers
Move your Minecraft instances to TRS Launcher – worlds, mods, resource packs, settings and servers from the official launcher, Prism, CurseForge and more.
Friends & chat
Add friends in TRS Launcher, chat in direct messages and groups, send pictures and server invites, join friends' worlds and report abuse.