Your first instance
An instance is a separate Minecraft installation with its own version, mods, worlds and settings. You can have as many as you like – for example one for the newest release, one for 1.8.9 PvP and one for a big modpack.
Create an instance
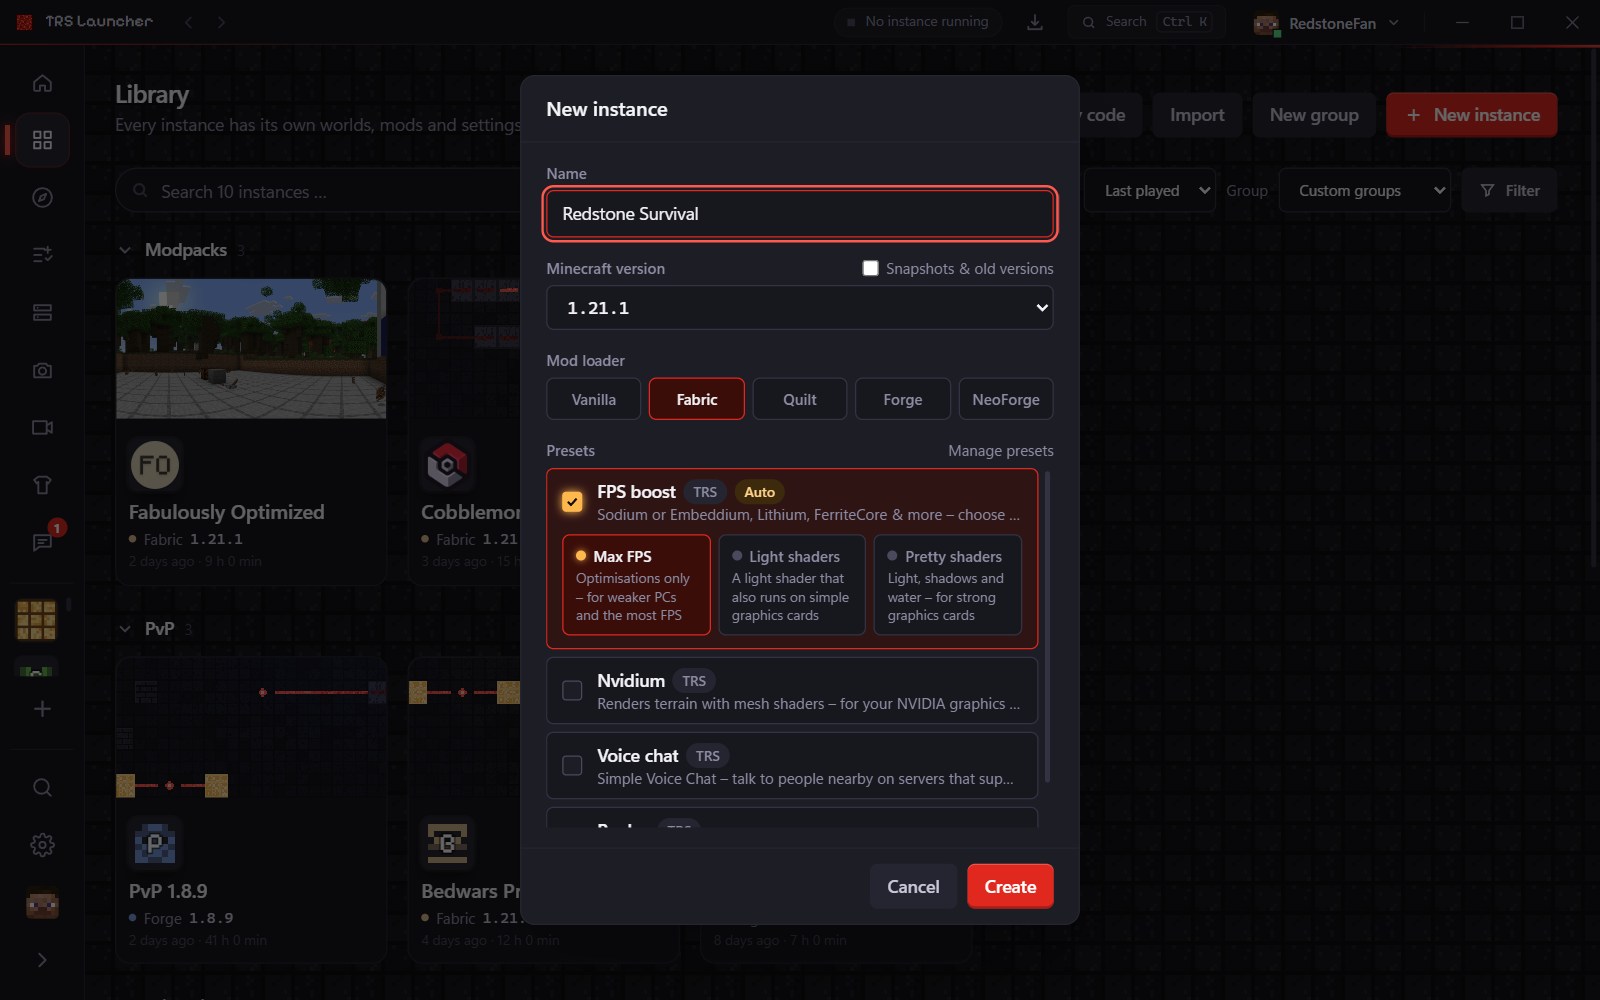
Open "New instance"
Click New instance in the left sidebar, in the Library or on the home page – or press Ctrl N.
Name, version and mod loader
Give the instance a Name, pick the Minecraft version and a Mod loader: Vanilla, Fabric, Quilt, Forge or NeoForge. Tick Snapshots & old versions to see snapshots and very old releases too. Not sure which loader? See Mod loaders.
Presets (optional)
Below you can tick presets such as the FPS boost or Voice chat. They are installed wherever they exist for your version – see Mods.
Create
Click Create. The instance appears in your library right away.
Play
Press Play
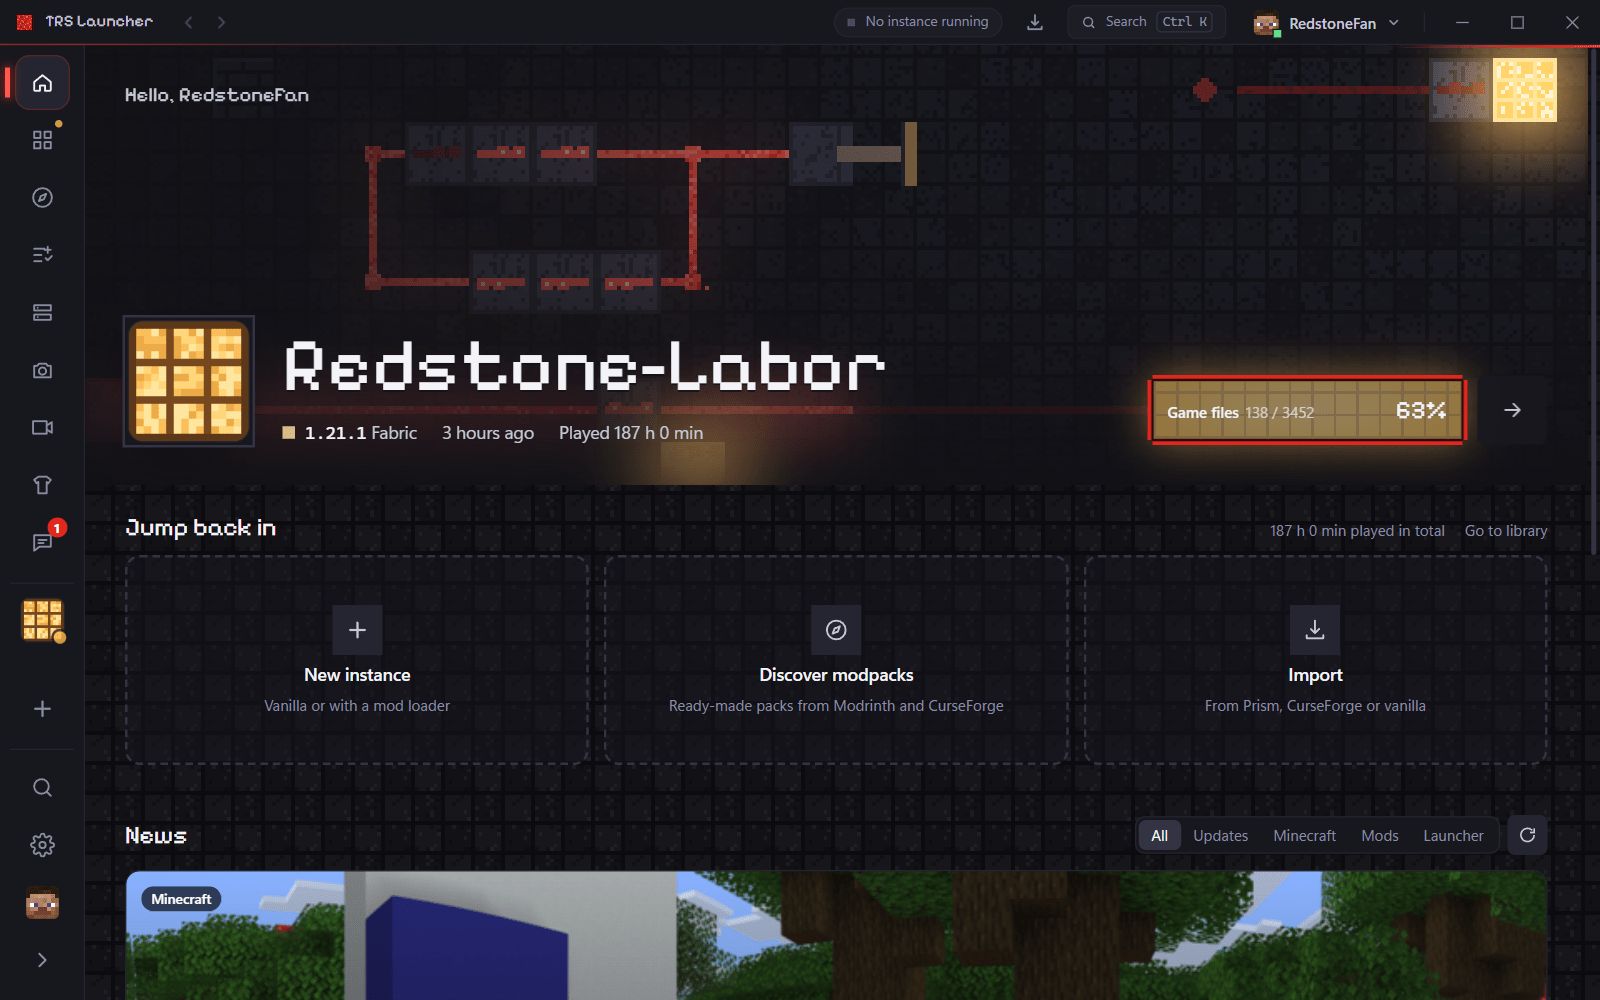
Click Play on the instance card, on the instance page or on the big lamp on the home page.
The launcher prepares everything
On the first start the launcher downloads what's missing – version data, Java, the mod loader, libraries and game files. You see the progress in percent; the redstone line on the home page charges up while the game starts.
The game runs
When Minecraft is running, the lamp glows. The title bar shows how many instances are running. Click Stop game if you need to end it.
Good to know
- You can close the launcher while you play – the game keeps running, and the launcher picks it up again on the next start.
- Downloads and installs run in the background. The tasks button in the title bar shows everything that's running, with pause and cancel.
- Jump back in on the home page starts your last played instance.
Next steps
Sign in
Sign in to TRS Launcher with your Microsoft account, add several Minecraft accounts and switch between them with one click from the title bar.
Android: install the APK
Install TRS Launcher on your Android phone or tablet: download the APK, allow the install once, sign in with Microsoft and play Minecraft Java.